How to Build a Room in the Garage: Step-by-Step Guide
Last updated Thursday, September 19th, 2024
Want to know how to build a room in the garage? This guide will show you how to plan, prepare, and execute each step of the conversion. Learn how to transform your garage into a functional new space.
Key Takeaways
- Start your garage conversion by planning the room’s purpose and getting the necessary building permits to comply with local codes.
- Prepare the garage by cleaning the space, measuring for ventilation, and installing subflooring to provide a solid foundation.
- Add finishing touches like insulation, drywall, and proper ventilation before furnishing and decorating to make the new space comfortable and livable.
Whether it's storage or an extra space to build things in, we're shed builders that make the most of your backyard space with a high-quality, long-lasting and durable shed or garage.
Planning Your Garage Room Conversion
When dreaming up a new purpose for your garage, think about what your family needs most. Is it an extra bedroom for a growing family, a quiet home office, or a space where you can get your fitness on with a home gym? Determining the room’s purpose is a crucial first step. Once you have a vision, it’s time to get into the nitty-gritty: creating a detailed floor plan. This is your blueprint for success, guiding you through where to place walls, doors, and windows, and ensuring you meet any special requirements based on the room’s new role.
But before you start tearing down garage doors or erecting new walls, there’s some homework to do. You’ll need to dive into the local building codes and regulations. They’re not just suggestions; they’re the law, and they’re there to make sure everything from fire safety to zoning is up to snuff. And yes, you’ll need to obtain a building permit. Think of it as getting the green light from your city or county to go ahead with your grand garage conversion plans. It’s a bit of legwork involving submitting your floor plan and possibly scheduling inspections, but trust me, it’s better than having to redo everything later. Many building supply stores can help you find the necessary materials for your project.
Preparing the Garage Space
Before any magic happens, you’ve got to prep your garage. Roll up your sleeves because it’s time to tackle those oil stains on the floor. A little elbow grease with laundry detergent and warm water can work wonders for small stains, while concrete degreaser and kitty litter team up to tackle the bigger messes. And let’s not invite mold to the party. Air out the space, wage war on potential mold with a water and oxygen bleach concoction, and you’ll be setting the stage for a healthy living area.
Next, you’ll want to measure your space. Knowing the height and width of your garage is more than just a factoid—it’s critical for planning ventilation, making sure you’ve got enough air flowing through to make the space comfortable. If you’re low on windows or the air’s just not moving, consider an exhaust fan kit to keep things fresh.
Installing Subflooring
The subfloor is where your room starts to take shape—literally. It’s the foundation for all that comes next in your garage conversion. To keep things on the level, use a laser level to mark lines, ensuring your new subfloor is a seamless extension of your home’s existing floor. Insulation isn’t just for walls; laying some fiberglass under your plywood subfloor can make your new room snug as a bug. If you’re working with a concrete floor, this step is even more crucial to keep the space temperate.
Now, we anchor! Using anchor bolts to lock down your subfloor is like making a promise to your future room that it’s built to last, all while staying on the right side of those local building codes we talked about.
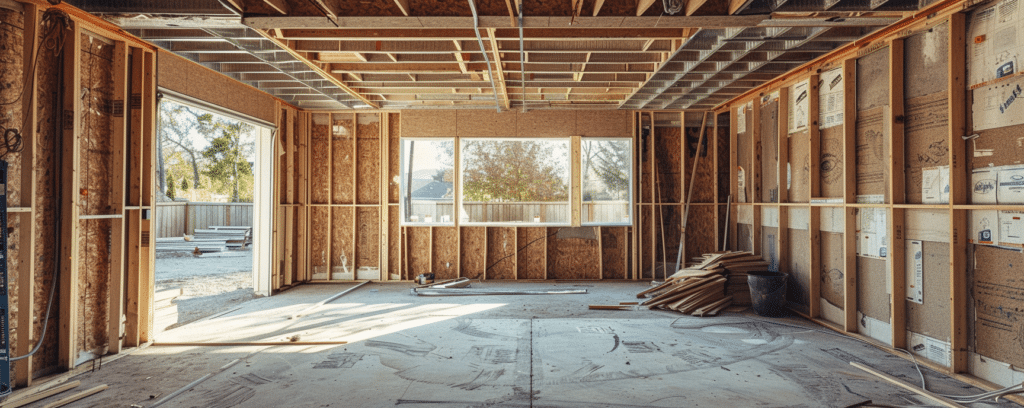
Framing Interior Walls
With your subfloor set, it’s time to give your room some shape—cue the framing of interior walls. Here’s how to do it:
- Grab your tape measure and sketch out where your new walls will live.
- Cut those interior wall stud pieces to size and secure them to the top and bottom plates, adhering to that ever-so-important 16 or 24 inches on center.
- This isn’t just busywork; it’s ensuring your walls are sturdy and ready for whatever you throw at them (or hang on them).
Now, stand those walls up and secure them in place, making sure everything is plumb and square. It’s like setting up the skeleton of your room, and you want it to be strong. Don’t forget to frame out those openings for doors and windows—you’ll thank yourself later when they fit like a glove.
Adding Doors and Windows
 Doors and windows are more than just entry points and peepholes; they’re the eyes and gateways to your new space. When it’s time to cut holes for windows, follow these steps:
- Measure twice (or thrice) and cut once.
- Use masking tape to mark out dimensions before drilling and sawing your way to open-air freedom.
- Slide the outer window frame into its new home, make sure it’s snug, and screw the inner frame into place.
As for doors, they may seem like a daunting task, but nothing says ‘welcome’ like a beautifully installed door. While it’s tempting to DIY, leaving this to the professionals can save you headaches, especially with those tricky garage door springs. And if you’re feeling modern, a glass garage door can be a sleek alternative to the traditional wooden kind, letting in light and opening up the space.
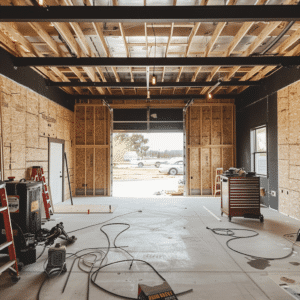
Electrical Wiring and Plumbing
With the walls up, including the east wall and the interior wall, it’s time to get the electricians and plumbers in to start the inner workings of your new room. Electrical work is the lifeblood of your space, powering lights and tools, so getting it right is a must. Run those wires, install outlet boxes, and make sure to turn off the power when you’re at it—safety first.
Plumbing might not be glamorous, but if you want that dream en-suite or that handy laundry room, it’s got to be done. Get those pipes and drains in place, and remember, inspections for both electrical and plumbing are not just a good idea; they’re required. You want everything to be up to code, trust me.
Insulating and Drywall Installation
Insulation is the unsung hero of any room conversion. It keeps you warm, it keeps you cool, and it keeps the bugs and elements out. When you’re converting a garage, you need to think about wall and ceiling insulation to maintain that oh-so-important comfortable environment. There are plenty of options out there, from stone wool, which can keep your room cozy and quiet, to spray foam, which is a champ at sealing in energy efficiency.
Once you’re insulated, it’s time for drywall to give your walls that smooth, finished look. Drywall is like the canvas for your new space, ready for whatever color or texture you throw at it. Make sure to add insulation before you hang it up—it’ll make your space that much more of a haven.
Ceiling Installation
What’s overhead can have a huge impact on how a room feels. If you’re after a classic look, sheetrock can give you that flat finish. But if you want to add some drama, consider a vaulted ceiling with 1x10s or primed pine for a touch of grandeur. Remember those roof trusses you installed? They’re the backbone for whatever ceiling choice you make, ensuring stability and style.
Don’t forget about practicality. If you’ve got an attic above, including an access door in your ceiling design can turn dead space into valuable storage—a win-win for keeping your new room clutter-free.
Flooring Options
 Flooring is the foundation—literally—of your room’s design and function. Whether you’re laying down:
- engineered wood that can handle the ups and downs of humidity
- vinyl flooring for easy maintenance
- tiles for a pop of color, with interlocking designs for a DIY-friendly installation
- ceramic tile for a polished look that can handle high-traffic areas with ease
There’s a surface for every space.
Got a dual-purpose space? Here are some options to consider from building supply stores:
- Acid-stained concrete: gives you that granite-like look while standing up to whatever you drive or drag in
- Natural stone: provides durability and a stylish look
- Indoor/outdoor carpeting: offers a blend of durability and comfort
Painting and Finishing Touches
Now, let’s talk paint. Here are some tips to keep in mind:
- Prime those garage walls first for a bond that’ll last through thick and thin. A PVA primer for drywall or oil-based for wood is your ticket to a peeling-free future.
- When you’re picking colors, remember that light hues reflect light and can make the space feel larger.
- Don’t skimp on those thin coats of paint for a finish that’ll stand the test of time.
Once your floors are in, it’s time to get colorful. Paint the walls, trim, and doors, and use painter’s tape to keep those lines sharp. It’s the finishing touches that take your garage from ‘just another room’ to a part of your home.
HVAC Considerations
No one likes to be too hot or too cold, so HVAC is key to making your new room comfy all year round. Start by checking your garage for signs of poor ventilation, like those pesky chemical odors or wild temperature swings. That’s your cue to get warm air moving with fans, vents, or a full HVAC system.
If your garage is a detached garage, you’ve got a bit more breathing room when it comes to ventilation. There’s no direct path for fumes or carbon monoxide to slip into your home, but you still want to keep the air inside fresh. Running ductwork from your existing HVAC system can be a solid choice, or consider a split heat pump for efficient heating and cooling.
Furnishing and Decorating
You’ve built it, now make it your own. Choose furnishings that fit the room’s purpose, whether it’s a comfy couch for a family room or a sleek desk for your home office. Decor is where you get to let your personality shine. Add a reclaimed wood accent wall for warmth in a living space, throw in some hanging plants for a studio vibe, or go for a crisp black ceiling to give your garage studio an edge.
Built-in storage and bookcases can turn your new room into a library, and whitewashing walls can give you that laid-back, modern look. And don’t forget about the outside. A patio or outdoor living area can extend your living space even further, perfect for those evenings when you want to step out and enjoy the fresh air.
Maintaining Your New Room
All good things need a little upkeep, and your new attached garage room is no exception. Keep it clean with regular vacuuming or sweeping to fend off the dust bunnies. And don’t underestimate the power of white vinegar for deodorizing—just add a few drops of your favorite essential oil to keep things smelling sweet.
Storage is your friend. Clear the room, categorize your belongings, and stash them neatly on shelves or in bins. It’ll keep your spacious garage looking sharp and make finding things a breeze. And don’t neglect the garage door. A yearly wash and bi-annual check-up will keep it in tip-top shape, ensuring your storage space remains accessible and functional.
Frequently Asked Questions
Do I really need to get a building permit for a garage conversion?
Yes, you definitely need to get a building permit for a garage conversion to ensure it meets local building codes and regulations for safety and legality.
Can I install windows and doors in my garage conversion by myself?
It’s best to hire a professional to install doors and windows in a garage conversion, especially for heavy doors or complex spring systems. Professional help can ensure proper installation.
What type of insulation is best for a garage conversion?
It depends on your needs. Stone wool provides fire protection and acoustic benefits, while spray foam is excellent for energy efficiency. Choose based on the main use of your new room.
How do I ensure my garage conversion is well-ventilated?
To ensure your garage conversion is well-ventilated, consider installing vents or an exhaust fan to circulate the air. You can also integrate the garage with your home’s HVAC system for better ventilation.
What flooring should I choose if I want to use my garage for multiple purposes?
You should go for acid-stained concrete for your garage if you want to use it for multiple purposes. It’s durable, resistant to car fluids and dirt, making it ideal for dual-purpose spaces.
Built for Your Life, and All the Things That Come With It
Whether it’s storage or a extra space build things in, we’re shed builders that make the most of your backyard space with a high quality, long-lasting and durable shed.
Quote Your Shed or text / call 757-663-8470